Imaging RoboRio 1.0
This page will teach you how to Program/Config your radio
Learn more about Radio
note
This is for RoboRio 1.0, if you have RoboRio 2.0 refer here
We will be using USB protocol as it is the best way to image your RoboRio.
IMPORTANT: Make sure you have USB A to USB B 2.0
Connection
- Have your USB A to USB B 2.0 on hand.
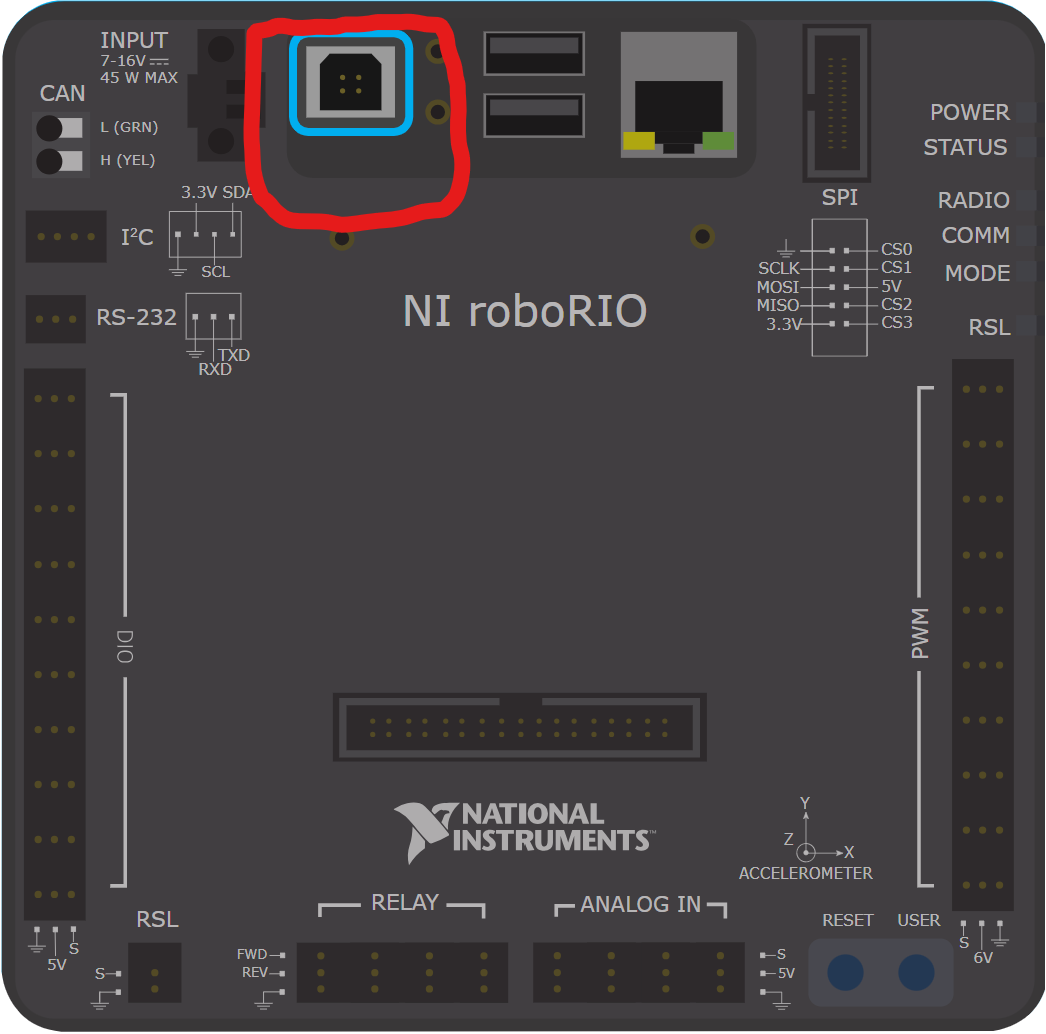
- Locate your RoboRio 1.0 and find the USB 2.0 Port as shown in the picture.
- Connect the USB B 2.0 head to the connector on your RoboRio.
Imaging Tool
Connect your USB A head to your computer
Open
roboRIO Imaging Toolapp
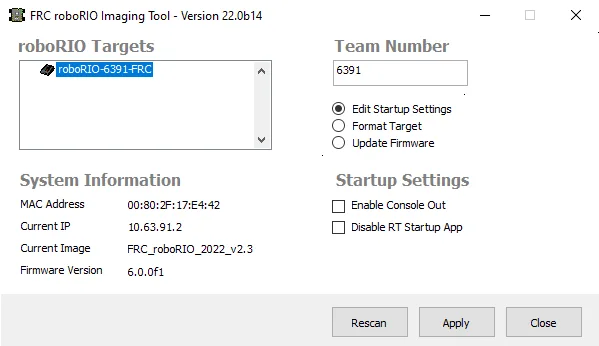
Let the application scan for the RoboRio.
note
If in the "roboRIO Targets" doesn't show your RoboRio click the Recan Button
- Select your RoboRio from the roboRIO Targets
- Change the "Team Number" section to your Team Number (Our team number is 4384)
- Select "Format Target"
- Select your Latest Image from the Select Image section
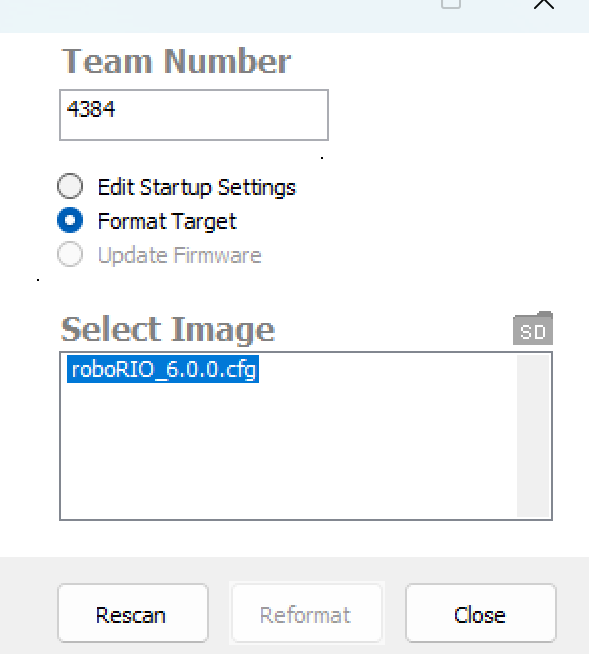
- Click "Reformat"
Once the reformatting is done, your RoboRIO is now reformatted to your new image! 🎉
tip
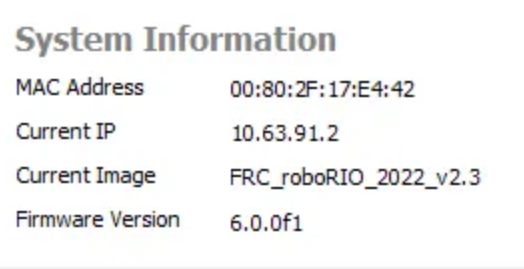
Double check if the reformatting worked by looking at System Information > Current Image.
It should show your latest image that is on your RoboRio.